|
The Hi-Z 8 Circle Receive Antenna Project
|
October 2012, a new lowband season arrives. After having used
8 Beverage antennas for some 15 lowband seasons, it was time to move on to
another receive system.
During these years our neighbor was so kind to let me use his field, and this
field in combination with our field enabled me to install Beverage antennas.
A new water project on his field made me look for an alternative.
I remembered information passed on via topband reflector about
an 8 element receive system that apparently was as good or even better than
Beverages.
A quick search in the archives brought me in contact with my new project:
an 8 element receiving antenna from Hi-Z Antennas.
Lee, K7TJR from Oregon, has spent lots of time developing this unique new
system. Lee and his Hi-Z partner Dick KO7N, responded quickly to my queries
about their system.
The wealth of information on their website www.hizantennas.com/
is at first a bit overwhelming (at least it was for me). My advice: read,
and read some more. There is plenty to learn about, and it is interesting
reading.
I put in an order for the Hi-Z 4-8PRO Eight Element Tri-Band
Array System. This array covers the 40-80 and 160m bands.
There are 80 and 160m monoband systems available (and smaller systems too),
but the tri-band array with a diameter close to 35 meter fits nicely on our
piece of land - the choice was quickly made.
No hassle with shipment, all items arrived in good order.
Mind you, this project isn't cheap and it requires quite some
preparation time before being able to put the system up. But the end result
is worth the buck!
I kept my receipts, and in the end I paid double the amount as what I initially
paid for the Hi-Z system.
Cables (coaxial + electrical), connectors, verticals, ground posts (oh no,
I didn't pay for those, tnx Guy), paint, stainless steel bolts and screws,
ertalon, plastic (cover) boxes...quite a few things went in there.
I am sure you can do it cheaper than I did.
If you are interested in picking up some ideas on how to proceed
with such a project, below follow photographs and a movie with explanation
on how I approached the project.
On the Hi-Z website you can find additional info from customers. Of course
it is always best to 'roll your own'.
Guy ON4AOI helped me out and gave me worthwile ideas for the
mechanical parts of this project, John ON4UN had a good tip for the layout
of the 8 circle.
Marc ON4MA gave me some Noalox (impossible to find in Europe) to put between
the aluminum elements of the verticals.
Lastly, but ever so important, Lee and Dick at Hi-Z are ever so helpful to
get customers on their way to success.
Tnx guys!
August 2014. Having used the Hi-Z 8 circle during 2 winter seasons,
here is an update on the performance. Remember, this a tri-band compromise
antenna.
There are Hi-Z 80 and 160m monoband versions that will no doubt (slightly)
outperform the tri-band version. I did not have the chance to compare the
tri-band with the monoband versions.
However, I did compare the Hi-Z 4-8PRO with beverages (1 wavelength on 160m)
and the K9AY array.
Over the years I have compared my K9AY (without any preamp) extensively with
my 8 beverages (without preamp) on 160m. Most I could hear on my bevs, I could
hear on the K9AY.
Only when signals got to a very marginal point, the bevs would be the only
rx antenna I could hear such signals on. And of course the output of a bev
antenna is better than the K9AY. Both are very silent antennas to listen on.
Comes the Hi-Z. It struck me at first how much noisier this
antenna is compared to the bevs (K9AY). Of course these are verticals and
they seem more prone to pick up man made noise.
I played a bit around and took the central preamp in and out of the circuit,
replaced the +6dB amps with the old ones (less 6 dB), put the 1000mp preamp
in and out (menu function 8.4 FLAT/TUNED) of action.
To sum it up: it took me a while to get used to listen to this antenna. The
F/B and F/S is excellent on 80 and 160m, less pronounced on 40m.
On 160m there was a minor 3rd order IMD generation problem with strong European
broadcast stations. Lee sent filters for this, which rectified the problem.
In the end, I took these filters out as the IMD problem was only noticeable
during daytime and with low impact.
Using the 4-8PRO without the central preamp and with the new
+6dB amps (at each vertical), the performance between a 1 wavelength beverage
and the 4-8PRO matches pretty closely.
Most of the time the bevs would sound more comfortably (less noise) in my
environment.
I am sure in a more rural environment, the 4-8PRO when using the central preamp,
would probably outperform my beverages.
Having said this, a final remark. When I worked AH0BT for my
#301 on 160m, it was done using the 4-8PRO.
AH0BT was not audible on my beverage at that time (A/B switching) ! Well done,
Lee !
[note from Lee K7TJR in The ARRL Letter for August 4, 2022: Hi-Z Antenna's full line of HF directive receiving array products will now be designed and manufactured by DX Engineering]
Click on the photographs to see the enlarged pictures. Good luck with your possible Hi-Z project !
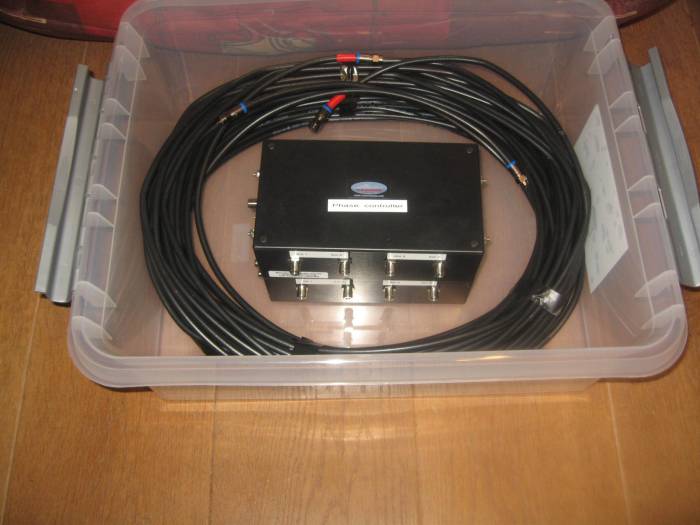 |
Finding a suitable plastic coverbox was a fun project on its own. The long + short delay cables and the Phase + PnP controllers, fit nicely. |
 |
I painted the plastic box with camouflage colors. Under the controllers I put some Styrofoam in case some water would miraculously get inside the box. Notice the 4 plastic gland nuts on the left and right. Here the RG6 coaxes from the 8 verticals will enter, no water can enter the box. The two gland nuts at the front of the box, are for the coax and control cable going to the shack. |
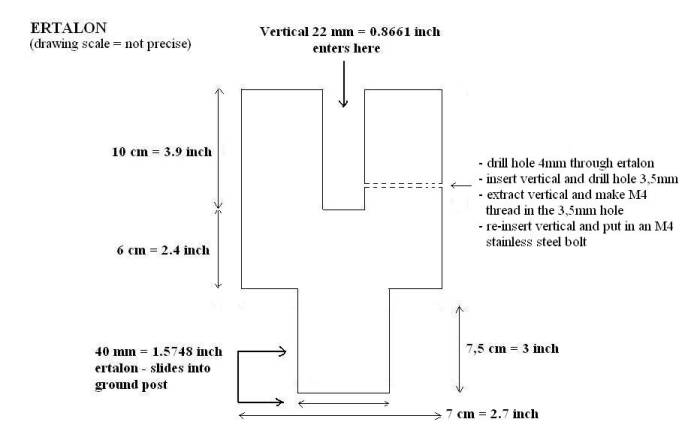 |
Here is a schematic of the ertalon insulation material I use to hold the verticals. A specialized craftsman worked on the eight pieces of ertalon: he drilled a 10cm deep hole in which the verticals will fit, and with his special machine he took away the right amount of ertalon at the bottom, so the piece can fit inside the ground post. |
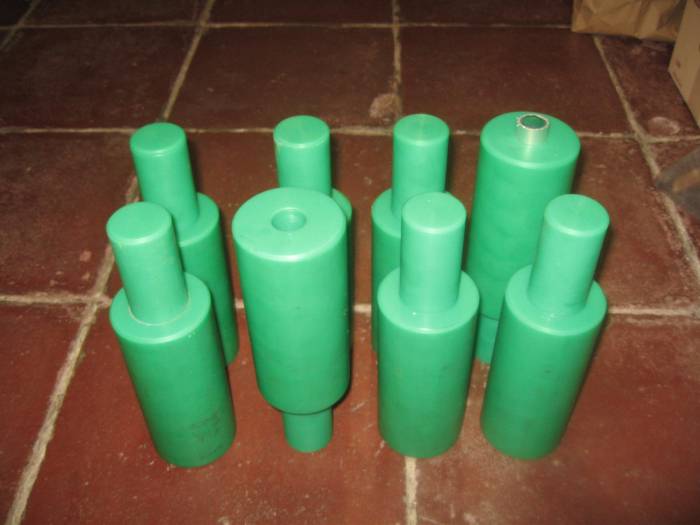 |
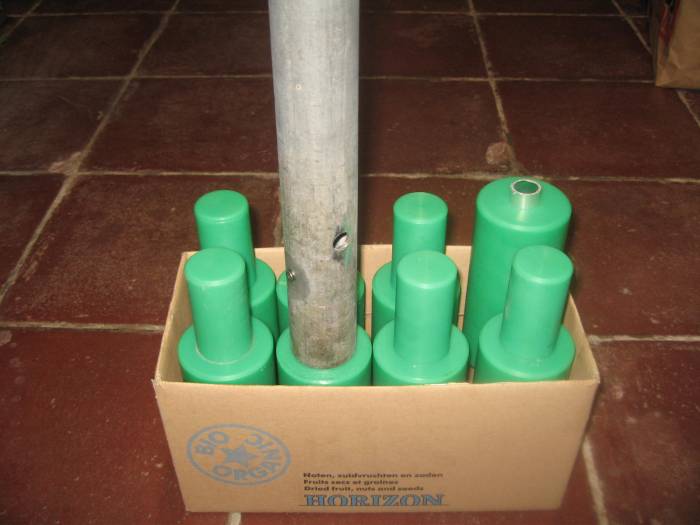
Here are the 8 pieces of ertalon, ready to use. The one to the right
of the back row, shows a piece of aluminum. This is the place the verticals
will go in, 10cm deep. |
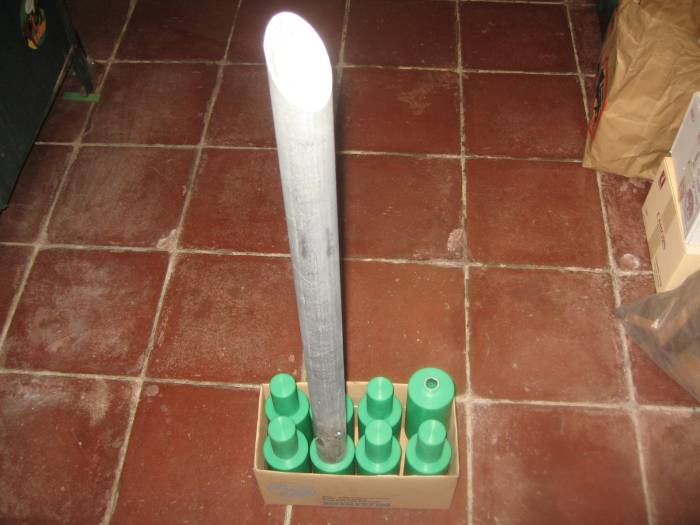 |
Here you see a ground post, upside down, slid over an ertalon piece. The post is galvanized steel, I may double it up with copper tubing next to the galvanized post, in case the grounding would be insufficient. First tests reveal the galvanized steel seems to be good enough. The bottom of the steel pipe was cut off so it could be driven more easily into the ground. Don't do this! All ground posts had the tendency of going down curved/slanting, not straight! Next season I will cut the bottom section to horizontal (flat) again, and sharpen the circular edge instead. Or cut the curved piece into an arrow form. |
 |
Close up of the ground post. Notice the M4 stainless steel bolt, to which the ground side of the Hi-Z Amp PLUS-6 will be connected. The bigger hole is made to put a steel bar through. This will facilitate removing the ground post out of the ground at the end of the season. |
 |
At first I used a piece of hardwood to drive the ground posts into
the ground (see 3 pictures further below, in the plastic box). I drilled
a hole in the hardwood, so it would fit over the ground post. This apparently
weakened the wood, and sure enough it broke. |
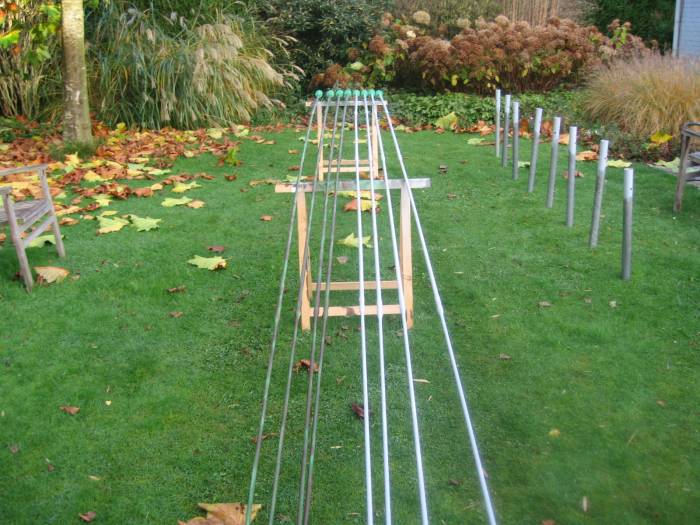 |
Here the verticals are lined up for a paint job. The four to the right have received the first two layers of gray 'ground paint', the four to the left are one stage further and have camouflage colors added. At the back you can see the ertalon pieces attached to the verticals. These homebrew verticals have almost the same dimensions as the Hi-Z AL-24 verticals, and are 7,19m tall. |
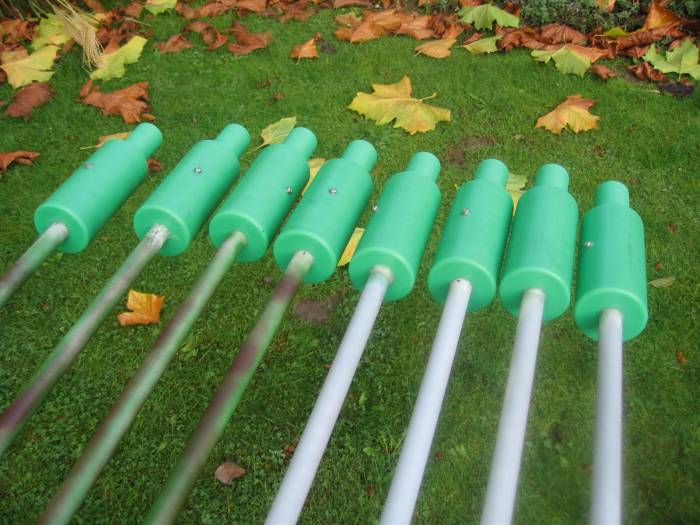 |
Closeup of the ertalon pieces attached to the verticals. Notice the
M4 stainless steel bolts (with washers) going through the ertalon, and
screwed into the vertical (for details, see the schematic from the ertalon,
higher up this page). The 'antenna/vertical' side of the Amp PLUS-6 is
attached to this bolt. As ertalon has the tendency to suck up water, I also painted the ertalon pieces. At the opening where the verticals slide in, I applied vaseline/petroleum jelly (also at the M4 bolt) to avoid water ingress. |
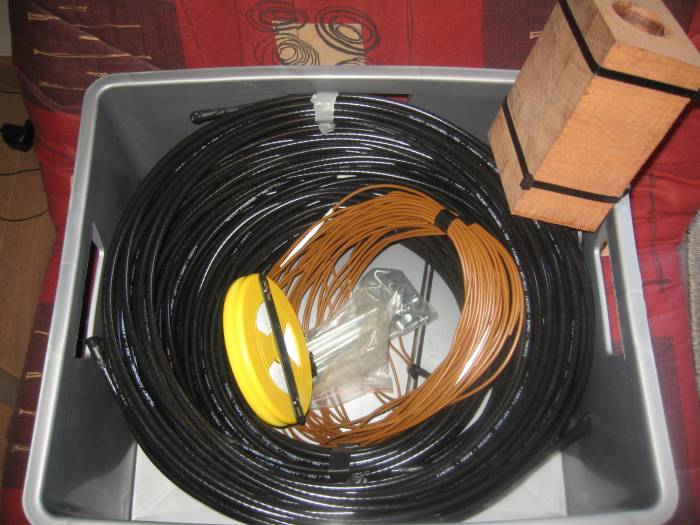 |
Here is a box I take out to the field when installing the Hi-Z verticals, a box which contains all necessities: hardwood (forget about it, see 3 photos above), tools, 8 coaxial cables to connect the verticals to the PnP controller, etc. |
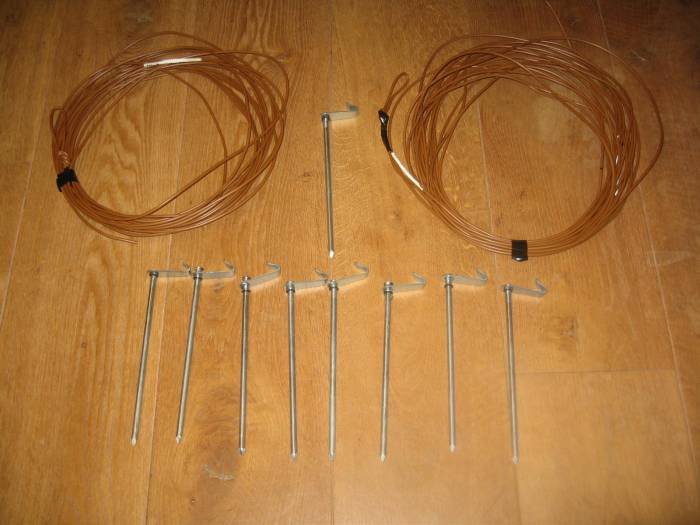 |
As I have to re-install the Hi-Z system every season, I need a quick way to lay out the 8 circle. These are the tools for it: 2cables/wires that don't stretch (one is the radius length, the other the length of one side, i.e. distance between two adjacent verticals) and 9 big nails. For more textual explanation and to see how I do it, have a look at this video. Using this method, the 8 circle is laid out in less than 10 minutes. |
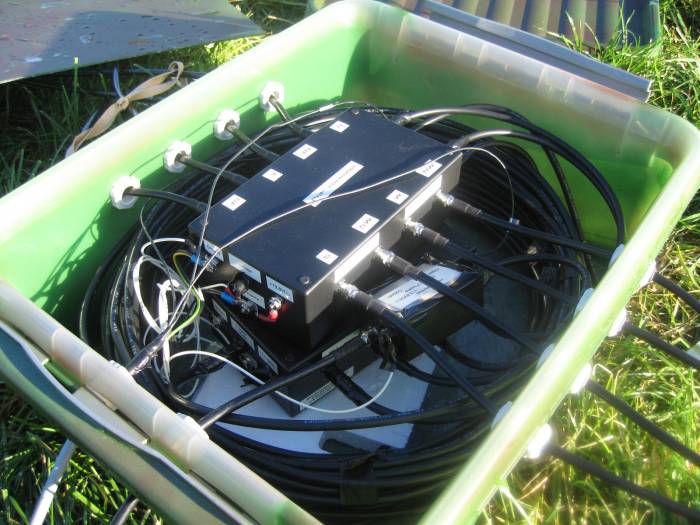 |
The box is outside! You can see the 8 coaxial cables from the vertical going inside through the gland nuts, connected to the PnP controller. Also the control cable and coax from shack are visible, the connections of the 3 control cables and gnd/13,8V to the controllers are made. Music please, maestro. |
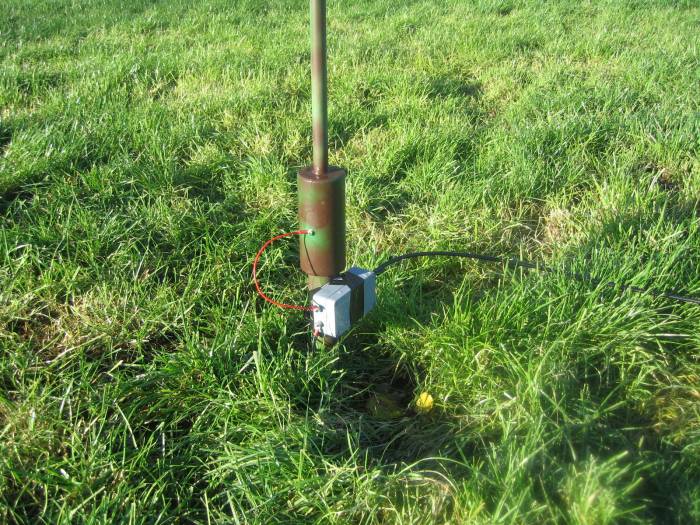 |
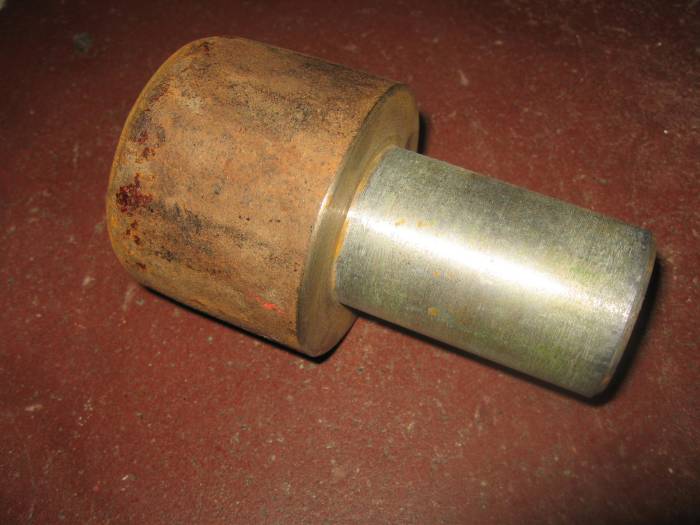
Here is the final product of one of the verticals: ground post, ertalon piece inside the ground post, vertical inside ertalon, and an Amp PLUS-6 attached with tape to the ground post. |
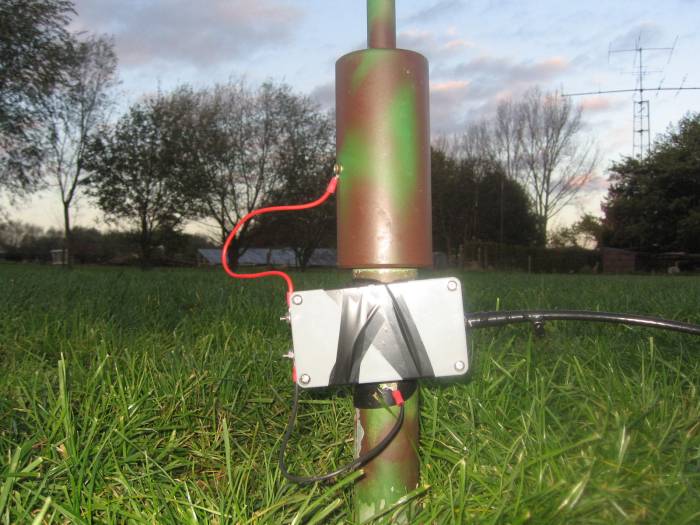 |
Detail of the amplifier Amp PLUS-6: red wire going to the vertical,
black to the ground post. Looks like I need to straighten out the amp
box and get it horizontal ;-) And it could use some camouflage paint. |
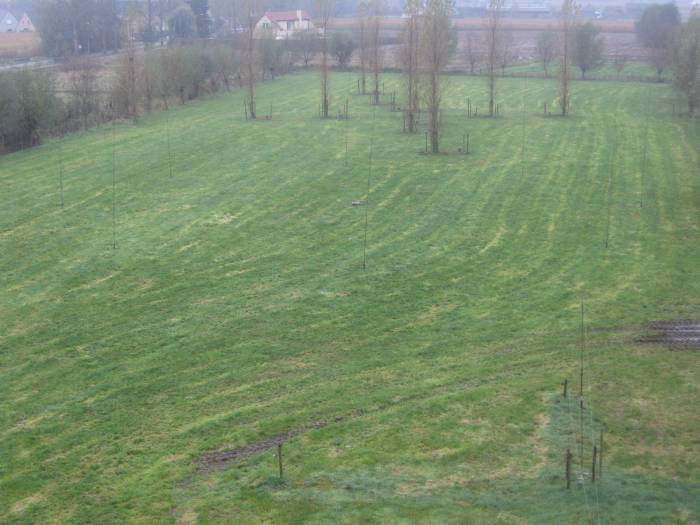 |
Here is a snapshot taken out of my antenna tower. Foreground, the K9AY array. Next is the 8 element Hi-Z receive antenna (hardly visible). At the back of the field, are the trees, still growing, of my triple 4-Square project. |
Send Comments and Queries to: